Carved Pumpkin
|
|
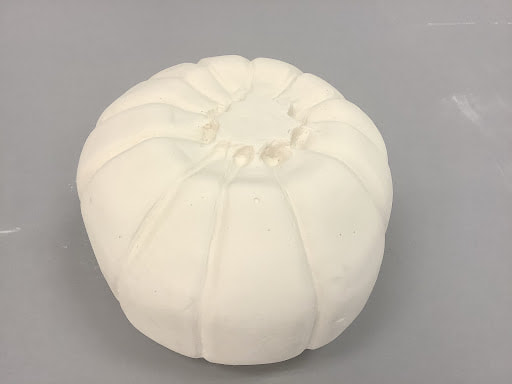
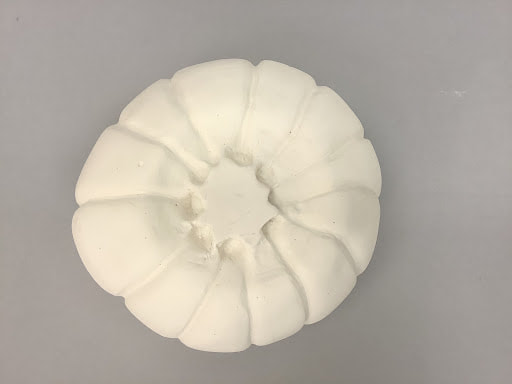
First, I made my mold box. I made by mold box circular so that I would not have to chisel a lot off of the mold. I made the basic shape of the pumpkin with soap to understand how to carve down. Once the plaster tried and was out of the mold I started carving down to get the shape of a pumpkin. Once the shape did not look like a circular block and looked more like an apple, I started to make the ribs of the pumpkin. I first started to make lines around the pumpkin but then carved so that they would have a 3-D effect. Having the ribs allowed the pumpkin to have rinds. Once the sculpture looked like a pumpkin, I decided to add a stem. I first tried to add a wire stem bit I did not like the way it looked. I then decided to carve the entire top of the pumpkin down to add a short stem. I made the the top of the stem look like messy heptagon to look realistic. I made the stem look like it was a little bit connected to the ribs and the rinds. When I was done with carving, I sanded by pumpkin and ran it under water.
